After The Sun - The CarPC Project
(and perhaps the first Sun-box running Windows)
Sun is a trademark of Sun Microsystems; Windows seems to belong to a Bill G. ...
For a while I was thinking of getting a PC into my car. Especially for my music collection as I spent a lot of time in my car and have little spare time when I'm at home (that's why this project took me over a year ....) and there was the need of cleaning up the music files. Best thing is to listen and delete what you don't like, so, if I would have a PC in my car I could do this stuff when in a traffic jam, but more important, I would have the ultimate music car collection.
So, that was the initial thought, unfortunately I came up with some extra thoughts and functionalities. What you find here is still unfinished, but I guess it never will be ....
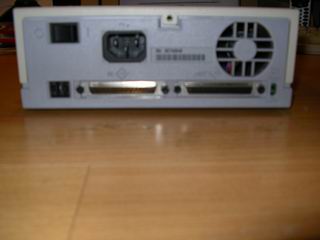
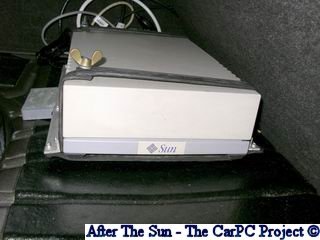
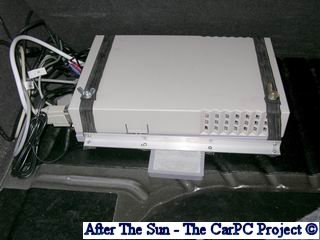
The Project is called "After The Sun" as I've used an old housing of an external SUN hard-disk.
You'll not find any "die-hard-deep-in-technology-stuff" here. There are a lot of sources that have deep inside technology information and if you're looking for that I suggest to check the links section.
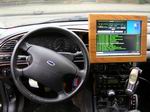
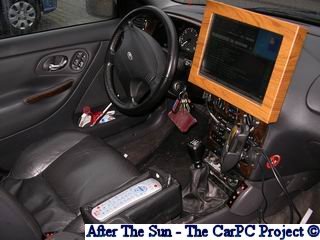
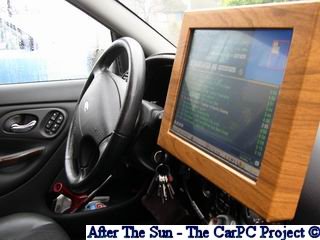
And how does it look in the car ?
- VIA EPIA-M Mainboard / 265MB ram
- Hitachi Deskstar 80GB
- Opus MPD-810H Power Supply
- ATI Remote Wonder
- 12,1" Touch Screen
- LiteOn IR mouse/keyboard
- GPS unit
The "Before Picture":
The "After Picture" :

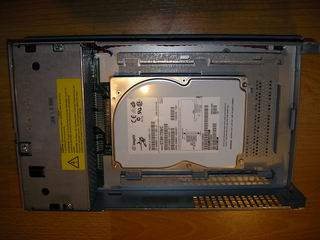
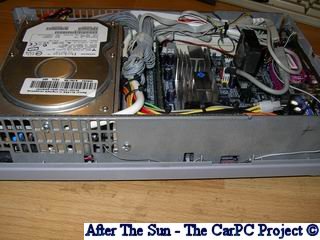
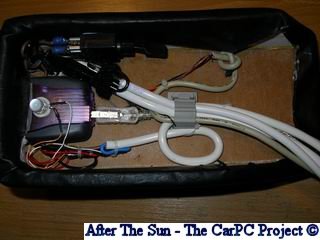
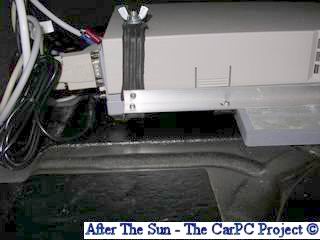
The "Inside View" ; The power supply is mounted below the HD :
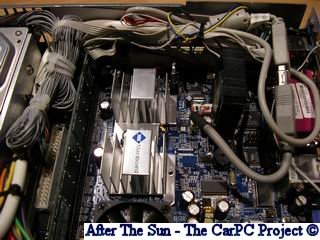
Below on the left the "Floppy Cooler" a fan with double sided tape on the Floppy port, the other white connector came from a floppy-power cable but is now connected to one of the USB ports for the remote.
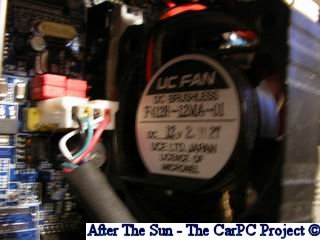
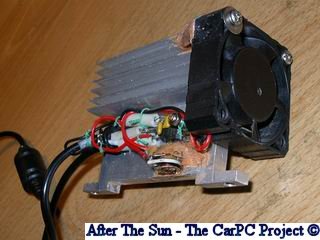
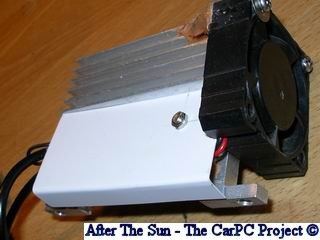
As the screen only accepted a stable 12V line, and this is not the case inside the car, I've raised the voltage and then brought it back to 12V using a laptop adapter and a 2A 12V stabilizer. The electronics would be put away somewhere in the car so I've added a small fan to help cooling :
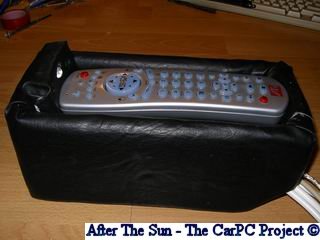
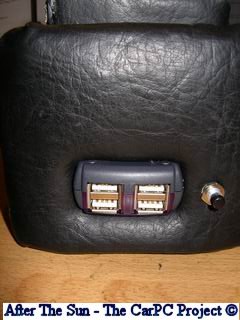
As it is a pain to have a remote lying around when driving I've made an additional mid-console, which also houses the on/off switch on the front, a small USB hub, and the electrical power wiring. It also has additional LED to light the remote in the dark and a LED inside the console that should give me a nice effect around the edges and are connected to the car's circuit so when the interior lights are lowered these will as well. The remote can be easily pulled out when required.
The system has a direct connection with the car's battery so it can be used independent of the status of the car's ignition key's position. To prevent problems the mid-console also has a main fuse and power switch.
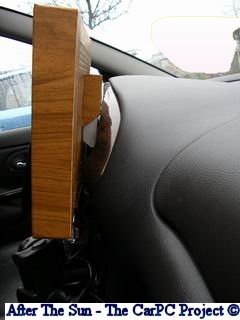
And how does it look in the car ?
I wouldn't spent a lot of writing here; just check out the pictures :
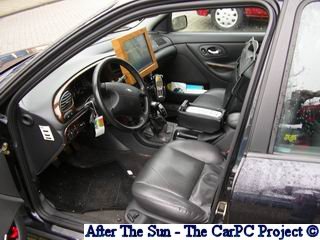

The unit is mounted in the back of the car. I've made a frame with magnets and rubber to keep it into place and provide some additional shock absorption.
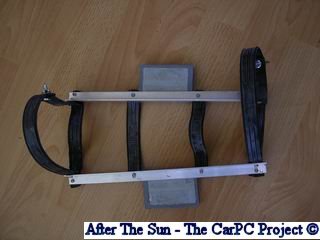
Originally the screen was was a build-in so I had to make a frame around it. It also had fixed cables which I've replaced with connectors as it has to be removable. The mounting in the car is basically a clamp which is put in one of the air outlets where you can slide the screen into and remove it as well. Here is a detail of the mounting :
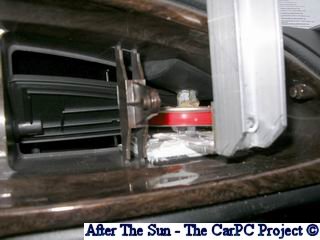
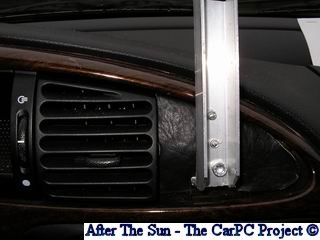
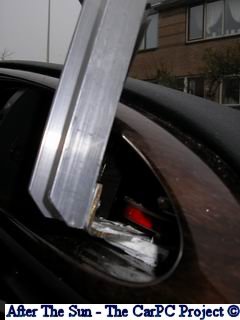
The screen can be pulled out within 10 seconds and the only thing left is the vertical mounting bracket.
To prevent being a driving Christmas tree when using the screen when it's dark outside and to compensate direct sunlight on the screen preventing to view it normally, I've used the Eclipse software, which has 3 modes; normal, low and high contrast.
I've tested a number of ready Car interfaces but found it easier to use virtual desktop software for the different applications, so each one of them could utilize the entire screen. For this I've used deskwin.
The OS is a plain Windows 2000 installation with WinAmp to play the music. Obviously anything can be modified, but I'll play around and see which changes I want to make to the set-up during the actual use in the car.
As with every project things go wrong and time is wasted. The first thing went wrong when mounting the Opus supply into the case, my drill was too long (at one side ..) and damaged one of the capacitors on the PCB and needed to be replaced. Not my favorite job as the PCB is multilayer and the capacitor had connections on both sides:
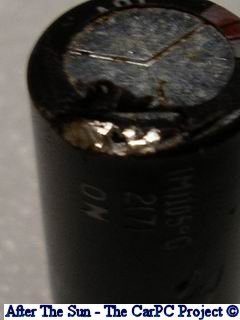
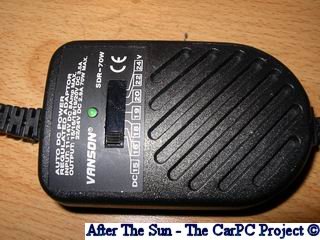
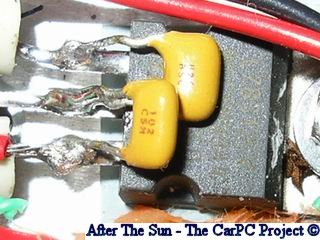
When testing the power supply for the screen, the output was exactly 12V but when connecting the screen it dropped to 9V making the backlight to switch off. This behavior was caused to the fact I forgot to add some capacitors on the regulator. These you can see on the detail photo of the regulator. Thanks Arjan for the tip !
I've also spent a lot of time playing with software, both on OS level as well as the (quite nice) interfaces already there. XP simply reacted too slow when booting and shutting down the machine. One requirement was to switch on and off as quickly as possible. For the ready made interfaces, like MediaCar I found them slowing down especially starting up music and too little possibilities which I believe I needed.
Getting the LCD to work properly was simple, and I did a lot of testing on my desktop PC, however it failed to work on the Epia because it's data-lines are weaker then the ones from a desktop PC. In combination with a long cable (about 5 meters) it fails to function properly. So I now have to build an LPT booster to make the signal stronger.
The mid-console I've build twice; I'll spare you the details ;-)
During the final installation in the car, the Remote which sits in the additional console failed to work. Although I'd extended the antenna from the receiver that was mounted inside the box, the shielding of the SUN case prevented it from working properly, so I had to move it outside of the box and it's now working fine.
In general some small stuff went wrong as well; I've burned my fingers on the soldering iron when working on the LCD; A bottle of beer went into the printer; superglue that could do everything except binding two objects to each other; Cables which I made 1-to-1 instead of mirrored, and so on. But in the end, quite honestly, I'm proud of the result.
- During installation the Internal LED in the console failed to work, also the pulse switch which I've build in was broken; I'll need to fix both
- I think I'll need to redesign the mid-console; although it functions I believe lowering it would be more convenient during driving, relocating the electronics and make it a console for the remote only would be an option.
- Connect the 20 * 4 Dotmatrix LCD to the parallel port and create HW driver for data lines
- WLAN ;-)
- Additional screens to view movies in the back
- Front and rear camera's with 10 mins. recording loop
- IR Led bar to support the back camera at night
Q - Can I buy your computer and/or car?
A - You would need to bring a s*it load of money, so nope
Q - Could you help me with my project ?
A - Nope
Q - What did this project cost on money ?
A - Well, most items were reasonably cheap; still about EUR 700,-
Q - What did this project cost on fluid ?
A - About 50 liters of beer
Q - What did this project cost on your night rest ?
A - I'm so tired, I forgot
Q - Where do you drive with this thing ?
A - In the land of wooden shoes; The Netherlands
Q - Who are you ?
A - I'm Bart
Q - Why did you choose a VIA main board ?
A - Others will do just fine, but remember the size they take and power consumption
Q - Why using an expensive Opus supply ?
A - It's not cheap, however converting to 230V will cost you more on fuel in the end.
Q - Did you drill any holes in your car ?
A - I can look all those car-lovers straight into their eyes; no holes were made.
Q - Why did you put everything on one page ?
A - Well, after spending so much time on this project I've better things to do then making a fluffy website
Q - Can I link to this information ?
A - I would appreciate it if you would let me know if you did
Q - If I would ask you a question via Email, would you answer ?
A - Well, Euhhh, it depends, but I would not count on it
Q - Do you have Hi-res pictures ?
A - Jup, but I do not see the need of spending a lot of bandwidth on it
Q - can I hire your car ?
A - See the answer to the first question
A collection of all kinds... http://www.mp3car.com/
What you can do with Mini ITX http://www.mini-itx.com/
Deskwin virtual desktop software http://www.yipton.net/
Eclipse software http://www.taylormacintosh.com/
Character LCD http://www.crystalfontz.com/
Media Engine Interface http://www.mediaengine.org/
Via http://www.viatech.com/en/index.jsp
Main board specifications http://www.viaembedded.com/
01/01/2005 Website up and runnig
03/01/2005 Added Change Log / Email working
14/01/2005 Removed counter / Changed Email address